|
Robots
|
|
<So> an automated sousaphone
Godfried-Willem RAES
version 1.0: 1999/2003 version 2.0: 2007 version 3.0: 2020/2021 |
|
Robots
|
|
<So> an automated sousaphone
Godfried-Willem RAES
version 1.0: 1999/2003 version 2.0: 2007 version 3.0: 2020/2021 |
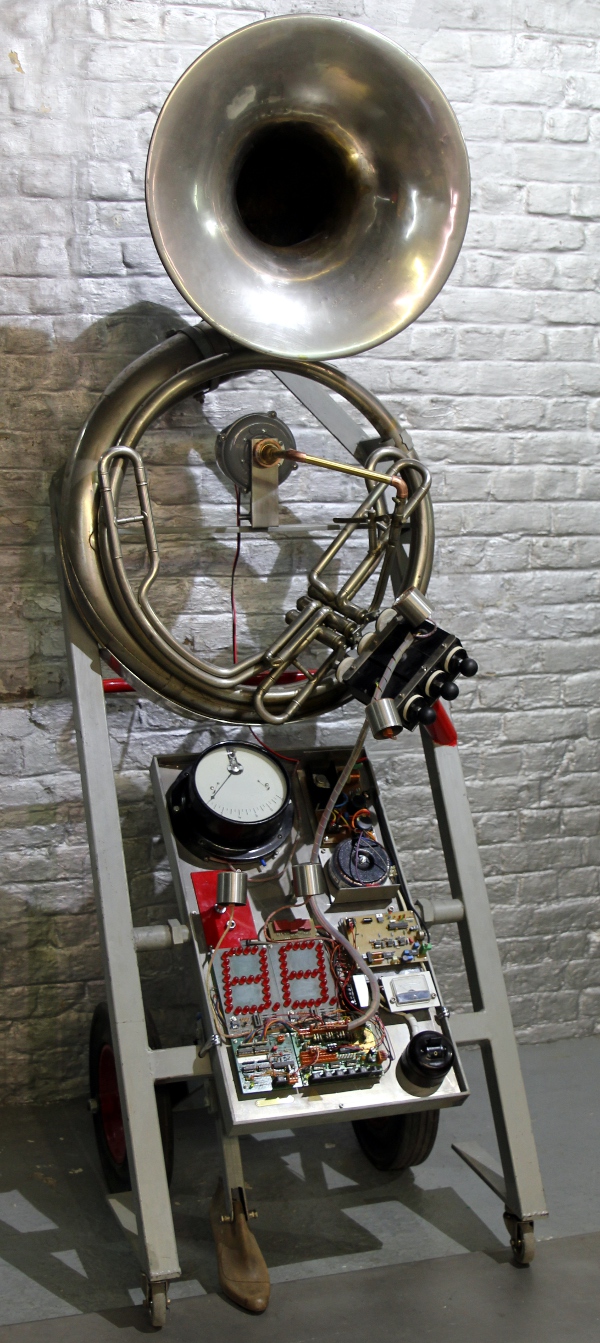
This musical robot consists of an old Bb sousaphone with an automated playing head and automated valves. The building history is quite long as this instrument went through three fundamental revisions and redesigns over the last twenty years.
Version 1: 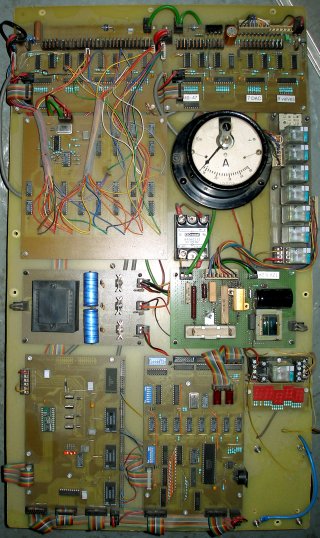
This first version was finished in 2003. For the control it used a laptop computer with a Centronics printer port. The MIDI commands came in on the laptop, translating them into the required commands on the printer port. Wind supply was fully automated. Controlling the robot was realized using the standard midi protocol. The sound generating mechanism used mimics human lips and does make use of the original mouthpiece of the instrument. A moving coil valve activates a leather pad (actually one taken from the lowest keyholes of a tenor saxophone, later replaced with silicon lips) that opens and closes the air traject through the mouthpiece. We did spend a lot of research time in finding a mechanism producing a realistic tuba sound. Hundredths of attempts using solenoid valves failed, because the magnetization of the iron alloys used is way too slow to open and close any kind of valve at speeds exceeding 40 Hz. Hence we decided to use a moving coil mechanism in a permanent magnet, much like the action of a regular loudspeaker, where the moving coil is mechanically connected to the paper cone. This mechanism is controlled by a switching signal of a frequency corresponding to the note to be played. At the same time the valves (activated by bidirectional solenoids) are pushed such that resonance through the instrument does occur. We dismissed the return springs in the original sousaphone valves as we found we could get more silent operation from the valves by pushing and pulling them under solenoid action. Wind pressure, derived from a small axial compressor, is applied to the artificial mouth assembly. The pressure is variable between 0 and 75mm H20. In fact, this pressure is lower than what we calculated to be necessary (350mm H20 is what brass players build up by their lungs in fff passages...), but we could not find anywere in the industry small and silent operating blowers in this range. (Forget about vacuum cleaners...). As a consequence we had to foresake the implementation of ff and fff (cuivré) playing in this robot.
Dynamic control is not an easy matter, and requires at least two interdependent parameters: wind pressure and signal amplitude. The valve membrane amplitude diminishes and the center point of movement symmetry shifts with frequency, when pulsed DC is used. Thus to compensate for the lower valve excursions at higher frequencies, the wind pressure has to be increased. On theoretical grounds it would have been better to adjust the distance between valve seating and mouthpiece in function of amplitude and frequency, but this posed us way too many mechanical problems. Thinking along this path, in the first version of this robot, we went for a DC pulse steering for the lower notes and transformer coupled AC steering for the higher notes in the compass. As a consequence for the user, note velocities for notes 39 and higher had to be derated with maximum values of 63 (for note 39) to 9 (for note 47).
The details of this version1 can be found in the archive file.
Version 2: 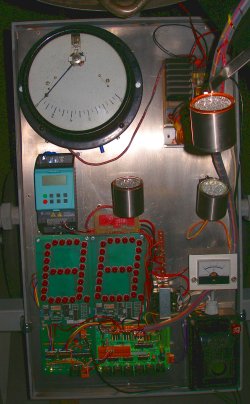
The laptop computer was replaced by two PIC controllers take care of the translation of the midi commands flowing into the quite complex command set the instrumental hardware requires. In this 2007 version of <So> we implemented pitch bend over a range of nearly a semitone around any note played. With this it became possible to score <So> in quartertone music with perfect intonation. However, do not forget to send the appropriate pitch bend command for every quartertone you want to get played. Also, note that for quartertone music, it will definitely make a difference when you have the choice between say note 36,5 played as 36 raised a quartertone up, or note 37 lowered a quartertone, since the instrument will always use the valve position for the 'normal' basic note. The valve combinations for notes 36 and 37 are indeed different! Our advise to composers wanting to write quartertone music for <So> is to experiment first with a few testscales using the different possibilities. It is possible as well to use <So> with non standard fingerings in order to get sound color variation. Refer to the detailed midi implementation for <So> given further on this page. In this 2007 version, we used a dsPIC and attempted to set the DC shift point for the lips (and thus the mouthpiece aperture) for the moving coil completely in the PIC firmware. By generating asymmetrical waveforms, the DC shift required to change the membrane position can indeed be realized. However, <So> still sounded best in its optimum range: 15-39. The dsPIC circuit is pretty simple, since we use only a single output and its complement (however not necessarily symmetric, since we wanted DC shift to be possible) for the wave generation. The 16-bit dsPIC controller takes care of the pitches generated as well as of their amplitude and enveloppe. These controllers offer complementary PWM outputs and thus allow very precise control of the movements of the moving coil driver around its mechanical symmetry point at rest. The circuit was first designed with a high power op amp (LM12) in a differential configuration, as output driver: Later -for version 2.0- we changed it for a more traditional ILP HY30 driver, since the power available from the LM12 was way too high. Note that a high quality audio transformer was used to coupled the wave generator output to the analog amplifier driving the moving coil head.
The midi mapping for this version was: 
The notes between brackets do not sound the best, so for best ('realistic') Sousaphone sound, restrict notes to the non-bracketed range. This range corresponds to what 'normal' sousaphones can produce. We have extended the range on the low side up to midi note 0. The note range 0-11 should be used only for special effects and will never sound realistic since they cannot normally be produced by the instrument. The footstep is mapped on midi note 48.(the force is proportional to the value of the velocity byte sent). It is not required to send separate commands for the pistons, since these commands are handled automatically in the firmware. The white lites are mapped on note 49, the colored lites on note 50 and the 'logos' display on note 51.
Pitch-bend was implemented, with a range of +/- 60 cents. Pitch bend commands do not change the valve combination used. Pitch bend is cancelled for every new note on. Only msb is relevant and should be used. However, the circuitry as well as the firmware supports full 14 bit resolution. If you want a note to be raised a quartertone, send pitch bend value 118 for the msb. To lower a note by a quartertone, send pitch bend value 10 for the msb.
Controller 1 was used for wind pressure. The motor frequency is displayed on the motor command panel. The minimum rotation frequency is set to 10Hz, such that a reasonably fast response is possible. An optimum setting for normal playing corresponds to midi value 50 (frequency 42Hz). For real good forte and fortissimo on low pitched notes, value 127 should be send. The lower the pitch requested, the more wind you should provide. For high pitches, wind pressure had to be somewhat reduced. Note that when using the program changes, (0 or 120-126) wind control in function of the note played was automatic. When in such a preset, the lookup setting could be overridden using controller 1. To re-enable the use of the lookup tables, send the preset (program change) again.
Controller 7 was used for volume scaling. It can be used to change the amplitude of playing notes. This controller sets the maximum amplitude value attainable with the velocity byte of any note. The setting for this controller was also important if you wanted to use the attack control. For very strong attacks, the level for controller 7 should be set pretty high and the velocities for the notes played, to very low values. The dynamic range of the attack equaled the difference between the setting for controller 7 and the velocity byte accompanying a note on command.
Techical details and circuit drawings for version 2 can be found in the archive file.
Version3 :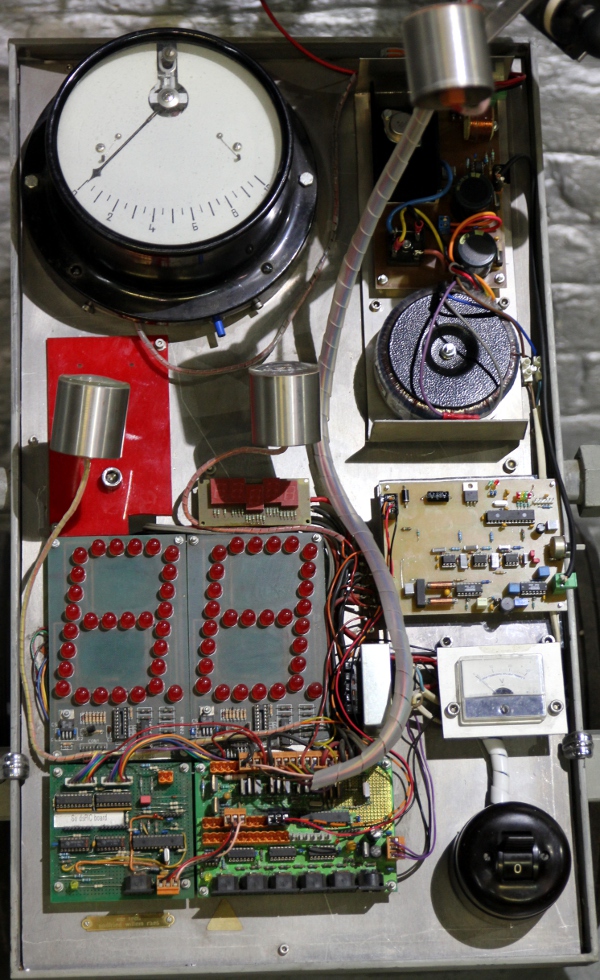
In this rebuild, finished february-march 2020, we took profit from the experiences learned in the construction of our <Flut> robot. We added many more controllers and changed quite some of the older ones. We do realize that composers wanting to use this robot, at first sight might be overwhelmed by the prohibitive looking amount of degrees of freedom , expressed in a corresponding amount of midi controllers to set and steer different parameters of the sound production. At the other hand, to achieve really musical -and not caricature-like- results with just about any monophonic instrument, it seems unavoidable to me as a designer to introduce quite a lot of the musicians craftmanship in the controls of the instrument. Intelligent composers therefore will have to be knowledgeable about brass instrument playing if they want to get convincing results from such robots. Definitely so, if they want to get results surpassing the possibilities of human performers. Of course we know that in reality there are lazy composers around, without this desire for precision and surpassing human capabilities. Composers that like to have fast results, even though dirtier than possible... Cartoon composers, so to speak. With those people in mind, we have made some compromise ways of controlling this robot, implementing some quick and dirty 'off the shelve' default settings corresponding to musically acceptable presets. These presets are documented in the midi implementation table below.
This version of the <So> robots uses three microprocessors: an 8-bit 18F2620 for he valves and the lights, a 16-bit 24EP128MC202 for the membane compressor, and a 16-bit dsPIC30F3010 for the displays.
Power supply voltages and currents:
Midi Mapping and implementation:
Midi note range: 15-69, or in musical notation:
We have limited the range on the low side down to midi note 15, the lowest possible pedal note on the sousaphone. The footstep is mapped on midi note 84.(the force is proportional to the value of the velocity byte sent). It is not required to send separate commands for the pistons, since these commands are handled automatically in the firmware. The white lites are mapped on note 120, the colored lites on note 121 and the 'logos' display on note 122. The eye lights are mapped on note 123, but these are automated to follow note-onn/off's, their intensity following the volume as set with controller 7.
Pitch-bend is implemented, with a range of +/- 60 cents. Pitch bend commands do not change the valve combination used. Pitch bend is cancelled for every new note on. Only msb is relevant and should be used. However, the circuitry as well as the firmware supports full 14 bit resolution. If you want a note to be raised a quartertone, send pitch bend value 118 for the msb. To lower a note by a quartertone, send pitch bend value 10 for the msb.
Controller 1 is used for the noisyness of the sound. [default = 8]
Controller 3: Vibrato depth [default = 3]
Controller 4: Vibrato speed [default = 64]
Controller 5: Tremolo depth [default = 2]
Controller 6: Tremolo speed [default = 10]
Controller 7 is used for volume scaling. It can be used to change the global amplitude of playing notes.It does not affect any ADSR parameters. The default range is 40dB, but can be changed with controller 80. The default setting is 104
Controller 13 changes the lookup table for the valve-pitch correspondence. The default is 0 and conforms to an empirical mapping of valve combinations for optimal resonant sound. Value 1 selects the theoretical valve combinations calculated after simplified acoustic theory. [default = 0]
Controller 15: sets the period for the entire ADSR cycle. When fast passages are to be played, it is advised to decrease the setting for this controller. It will than rescale the entire ADSR curve maintaining the proportions set with controllers 16,18 and 19. The default setting for this controller is 20.
Controller 16: set the attack duration. Default = 45. Although a setting to 100 sounds quite good, for orchestral parts it should be set to a much lower value, as high settings cause the instrument to sound too late. If you still want the slow attack, you have to anticipate the So part in the midi file or in the software.
Controller 17: sets the attack level. Default = 100. Note that he velo-level is added to this setting.
Controller 18: sets the decay duration. Default = 61. During the decay phase the sound level is modified such as to reach the velo level.
Controller 19: sets the release duration. Default = 90. The release phase will always be cancelled when a new note-on command is given during the release phase.
Controller 20: Sets the tuning (default = 64 = 440Hz)
Controller 34 sets the functionality of the display (values 0-3): With value 0, the display always shows the midi note the sousaphone is playing. With value 1, the displays show the value sent with controller 35 (value range 0-99), with value 2, controllers 36 and 37 can be used to display numbers and signs (0-15) to each display independently. With value 3, the displays will we completely off. Other values for this controller are disregarded. The default setting for controller 34 on startup is 0. The displays are fully functional, regardless the value for controller 66 (on/off).
Controller 35: if controller 34 is set to value 1, controller 35 allows you to send a numeric value 0-99 to the displays. Note that it is up to the user to limit the number to 99 (use count MOD 100, in your code). For higher values, strange signs do appear on the displays...
Controller 36: if controller 34 is set to value 2, controller 36 allows you to send a nibble to the msb of the display. For values larger than 9, the display shows 'strange' signs. It is up to the user to limit the range.
Controller 37: if controller 34 is set to value 2, controller 37 allows you to send a nibble to the lsb of the display. For values larger than 9, the display shows 'strange' signs. It is up to the user to limit the range.
Controller 66: on/off: enables the sound production. Note that setting this controller to zero will make sound production impossible. Also it will reset all controllers to their default cold-boot settings. Avoid sending on/off commands in fast succession, as the microprocessor recalculates all its lookup tables on reset and this takes some time (ca. 200ms)
Controller 80: sets the dynamic range used. Dynamic scalings can be: 20dB - 30dB - 40dB - 50dB - 60dB. [default= 64, for 40dB range] This scaling affects all dynamic related parameters (velo, 5,6,7,17).
Controllers 100-109: Set waveform parameters in conjunction with the program change settings. Sending these controllers will allways interrupt the sound production, as the lookup tables have to be recalculated. These controllers should never be used in sequencing software. [implemented for experts use only, as all details are fully documented in the GMT source code contained in so.inc].
Controller 123 switches all notes off. Releases the valve solenoids. Dims the lights.
Note Off commands are implemented. If note-off with release is used, it will control the release duration, overriding the setting of controller 19. Velocity is implemented and has a wide control range. Very soft notes do not sound very natural, since no real tuba is able to produce those. Also, with too low energy blown into the tuba, real resonances in the instrument will not even occur. It is possible to send succesive note-on's without note-off commands if pure legato playing is required. However, regular sequencer software does not support this.
Program Change:
Users should consider program change as unimplemented.
Is implemented only for research and development reasons. Normally users should only use program change 0, also the default on cold boot and after a reset. Following program changes are implemented:
Pitch Bend:
Pitch bend implemented. The range is limited to a semitone, thus a quartertone up or down. Pitch bend can be used for microtonal music. The coding follows from the example below, given for a fragment of the highest range of a quartertone scale:
 Most good sequencer
software (such as Cakewalk or Sonar) use the signed 14 bit format. To convert
fractional midi to the msb only pitchbend to apply follow following procedure:
if the fractional part is <= 0.5 then msb= 63 + (FRAC(note) * 128), if the
fractional part is larger than 0.5, we should switch on the note + 1 and lower
the pitch with msb= (1-FRAC(note)) * 128.
Most good sequencer
software (such as Cakewalk or Sonar) use the signed 14 bit format. To convert
fractional midi to the msb only pitchbend to apply follow following procedure:
if the fractional part is <= 0.5 then msb= 63 + (FRAC(note) * 128), if the
fractional part is larger than 0.5, we should switch on the note + 1 and lower
the pitch with msb= (1-FRAC(note)) * 128.
Technical specifications:
Design, research and construction: dr.Godfried-Willem Raes
Further collaborators on the construction of this robot:
Music composed for <So>:
| Back to Logos-Projects page : projects.html | Back to Main Logos page:index.html | To Godfried-Willem Raes personal homepage... | To Instrument catalogue |  |
<So> 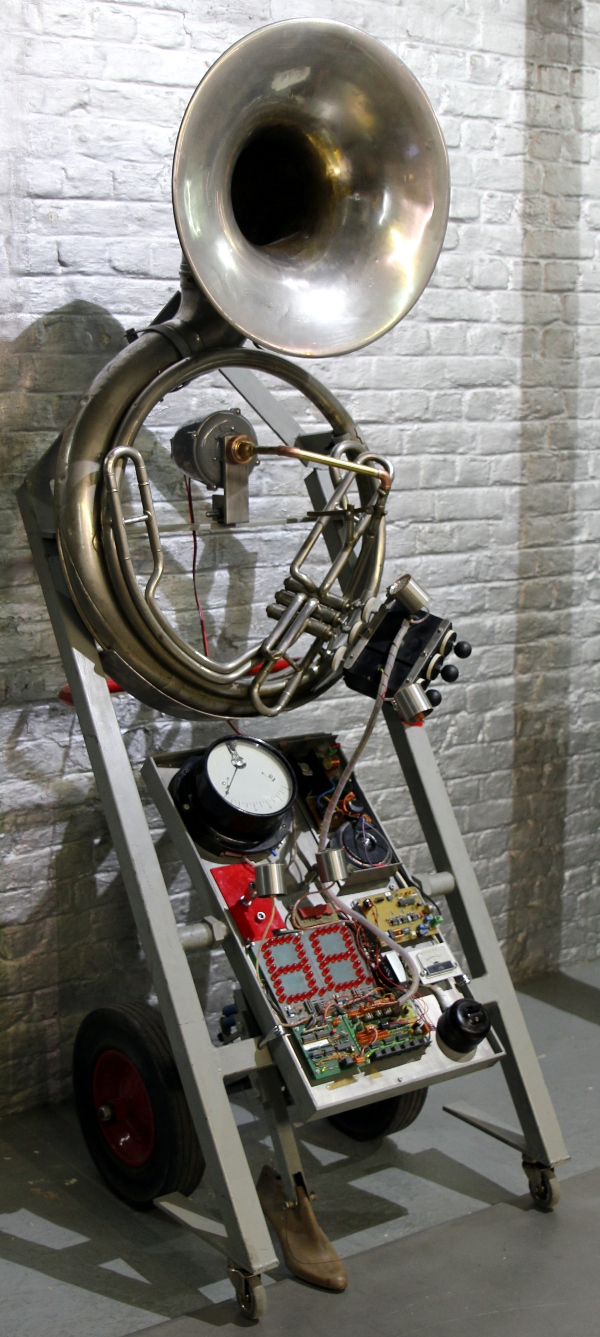
In het Logos robot orkest hadden we al heel vroeg behoefte aan wat meer variatie in de heel lage basinstrumenten, niet in het minst voor de verklanking van de opening van mijn apero <Technofaustus>. Alleen de <player piano>, <bourdonola> en <Vox Humanola> beschikten rond het jaar 2000 over een in de laagte redelijke bas. Nu is het maken van lage instrumenten op zich eigenlijk technisch eenvoudiger dan hoge vanwege de geringere eisen gesteld aan de precizie bij de bouw, maar, de afmetingen ervan swingen werkelijk de pan uit. Om midi noot 24 voort te brengen met open luchtkolommen bvb., heb je gauw een bouwhoogte nodig van ca. 6 meter... Tongwerken anderzijds klinken wanneer ze klein worden gemaakt, gauw erg nasaal en uiterst boventoonrijk, waardoor ze niet goed als dragende bassen aan te wenden zijn. De bezoekers van de Logos koncerten zullen dit ook wel al hebben opgemerkt bij het horen van de klanken van <Vox Humanola>, <Trump> en van <Krum>. Vandaar het idee om werk te maken van een geautomatiseerde bastuba. Een tuba, het instrument bij uitstek voor de verzorging van sterke dragende bassen, hadden we wel niet in onze instrumentenverzameling, maar een (helaas erg versleten) Sousafoon, ooit eens op de rommelmarkt gekocht voor een prikje, hing nog ergens in onze traphal sierraad te wezen. Nadere inspektie leerde ons dat het om een Sib instrument ging voorzien van 3 ventielen. Automatisering van die ventielen bleek een erg eenvoudige klus, maar het vinden van een adekwaat klankvormingsmechanisme had heel wat meer voeten in de aarde. Na heel wat research met namaaklippen in rubber, silikonen en neopreen, kleppen in koper, mica en teflon, kwamen we terecht bij een reeds in de 19e eeuw bekend mechanisme voor toonopwekking: dat van het diaphane register in sommige britse orgels. Het toongat, in ons geval het mondstuk van de sousafoon, wordt daarbij door een zachte en juist sluitende klep heel erg snel geopend en gesloten. Dat klinkt zo'n beetje zoals je met de palm van je hand op het mondstuk slaat: een zachte slaptongue op het instrument. Nu was het zaak deze klep tegen de juiste snelheid, overeenkomstig de resonantiefrekwentie van het instrument, te laten trillen. Elektromagneten bleken hopeloos te traag: we haalden nooit snelheden groter dan ca. 40Hz. Dan maar de zaak omgekeerd aangepakt: vaste magneet en lichte beweeglijke spoel. Zo hadden we ei zo na opnieuw de luidspreker uitgevonden natuurlijk... Hier echter, wordt niet een membraan in beweging gebracht door de spoel, maar uitsluitend de in silikonenrubber uitgevoerde afsluitklep voor het mondstuk. Deze klep vormt eigenlijk het equivalent van de lippen waarmee het mondstuk bespeeld wordt. Dit bleek prima te werken en liet ons de mogelijkheid ook lucht opgewekt door een radiale kompressor aan de achterzijde toe te voeren. De sousafoon wordt op die wijze ook echt aangeblazen. De pedaalnoten (midi 15 tot 22) bleken met ons op deze wijze opgebouwd artificieel hoofd uitstekend speelbaar: voor menselijke spelers zijn die tonen zo goed als onhaalbaar). Alleen om snel van lage naar hoge noten te kunnen overgaan, konden we geen snel genoeg reagerend drukventiel verzinnen. De radiale kompressor is weliswaar in druk regelbaar gemaakt, maar door de inertie van de schoepen, reageert die eerder traag op winddrukkommandos. De tessituur zal dus beperkt blijven tot de diepere regionen van de muziek (tot hooguit, en niet zonder moeite, midi noot 47).
Als speels extraatje hebben we onderaan deze robot een houten leest -aan de onderzijde met ijzer bekleed- gemonteerd, die bekrachtigd door een elektromagneet, de maat kan tikken op de grond; 't heeft voorwaar iets menselijks zo... Ook enkele LED-spotjes werden toegevoegd om de visuele attraktiviteit nog iets te vergroten.
De <So> robot werd op het 21 augustus 2003 koncert van het Logos <M&M> ensemble voor het eerst ten doop gehouden. In de daaropvolgende weken werden nog vele verbeteringen in de werking van de robot aangebracht. Hij groeide zowaar op. In 2005/2007 onderging <So> een eerste komplete 'redesign' en upgrade (Versie 2) , waardoor hij nu ook naar een standaard midi protocol luistert en ook de ventielen grotendeels van bijgeluiden werden ontdaan. Het was zijn puberteit. De tweede bouwfaze met verdere verbeteringen werd na heel wat research en experimenteel werk, afgerond in de zomer van 2007. In deze upgrade werd <So> voorzien van tooninflektiemogelijkheden (via pitchbend), klankkleurmogelijkheden, en van een groot 2-digit display voor kommunikatie met live musici en/of dansers in het M&M orkest. <So> kan van nu af ook worden gebruikt in kwarttoonsmuziek en heel wat 'extended' techniques zijn nu ook mogelijk geworden. De korrekte en muzikale besturing van <So> vergt evenwel vrij veel inzicht en begrip van koperblaasinstrumenten van de komponist. De robot kan zeker niet beschouwd worden als een midi-synth waar je zowat eender welke kommandos kan op loslaten. De volledige dokumentatie van de midi-implementatie is opgenomen in de engelse tekst op de <So> webpagina en zal zeker door belangstellende komponisten moeten worden doorgenomen. Om komponisten toch enigszins op weg -en in toom- te houden, voorzagen we <So> van een heel grote analoge meter waarop het vermogen toegevoerd aan de mond kan worden afgelezen. De naald van deze meter mag nooit tegen het maximum (10) aanlopen. Overtredingen hiervan kunnen de robot ernstig beschadigen. Voor 'quick-and-dirty' komponisten en eerste vlugge schetsen, voorzagen we <So> ook van een aantal gestandaardiseerde presets.
In februari en maart 2020 ondernamen we een grondige revisie van
deze robot. Het lip-mechanisme bleek na bijna 20 jaar dagelijks gebruik helemaal
versleten en ook andere aspekten van de klankvorming waren stilaan aan een upgrade
toe. Uitgaand van eerdere suksesvolle ontwerpen en realisaties (o.m. <Ob>,
<klar> en <Bono>) ontwikkelden we een veralgemeenbare teorie voor
de bepaling van de excitatie in de klankopwekking. De metode verloopt in enkele
stappen alsvolgt:
1. Ontwerp van de membraancompressor - Lavaltuit kombinatie.
2. Voor een reeks toonhoogtes, exciteer het instrument met een zuiver sinusvormig
signaal, waarbij uiteraard de juiste vingerzettingen moeten worden toegepast.
Het is van groot belang de uitsturing zo groot mogelijk te maken, zonder de
driver echter te overbelasten, want dan treden ongewenste vervormingen op. Maak
een opname van de akoestische output van het instrument (1 m afstand van de
bron, reflektievrije ruimte, meetmikrofoon) en sla die op als .wav bestanden
(44.1kS/s, 16 bit).
3. Middels een programma voor audiobewerking, knippen we uit elk opgenomen sample
8 volledige periodes. We zorgen ervoor dat ze in faze worden gebracht met het
sinus signaal gebruikt voor de uitsturing.
4. De bestanden worden omgezet in genormaliseerde arrays. Ak(). Software daarvoor
maakt deel uit van de libraries voorhanden in ons GMT programma.
5. Bereken nu een reeks arrays waarin het verschil tussen de sinusgolf en de
opgenomen golf worden opgeslagen. Dif() = Ak() - Sin()
6. Het bruikbare excitatie signaal wordt berekend alsvolgt: Ex() = Sin() - Dif()
= 2.Sin() - Ak().
7. Analyseer de golfvorm van het instrument zoals het door een menselijke bespeler
klinkt. Gebruik voor die opnames bij voorkeur hetzelfde instrument dat moet
worden geautomatiseerd. Meet de preciese lengte van elke periode en bepaal de
aperiodiciteit. Die moet als jitter worden toegevoegd aan het excitatiesignaal.
8. Wanneer de klank nog onbevredigend blijkt, herneem dan de stappen 2 tot 6,
maar nu met een opgenomen sample van het menselijk bespeelde instrument als
excitatiesignaal.
Gezien de gewijzigde instellingen van de controllers geimplementeerd in deze
versie 3, moeten bestaande midi-bestanden waarin So voorkomt, worden aangepast.
Enkele vuistregels terzake verschijnen binnenkort op deze pagina. Hier zijn
alvast onze eerste bevindingen en aanbevelingen:
Voor de velocities moeten relatief hoge waarden gebruikt worden voor een goede klank.
Godfried-Willem Raes
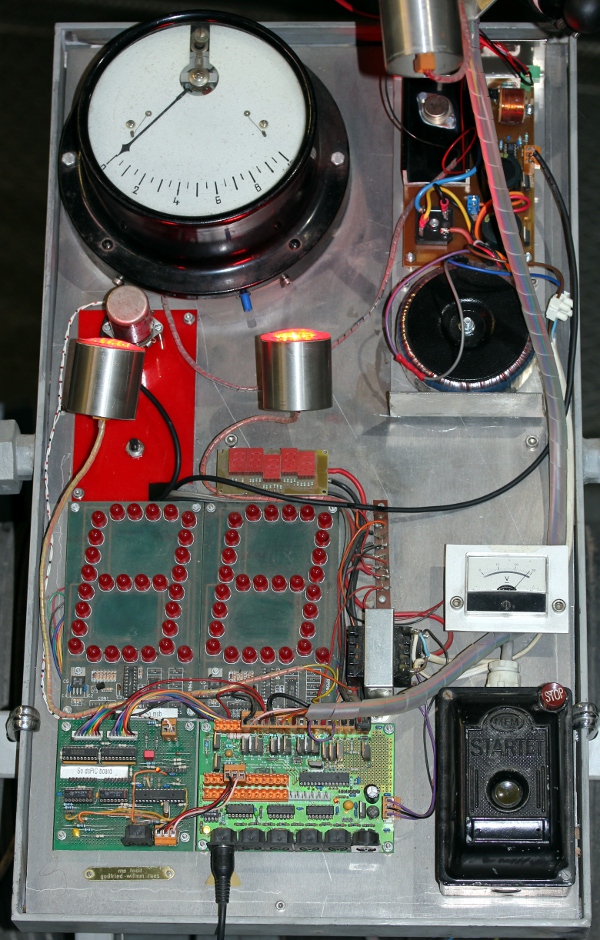
The left picture shows the original circuitry, version 1.0, operational up to june 2007. The picture in the middle shows version V2 finished in august 2007 and version V3.0, 2020, is on the right.
Construction and research diary:
 It's a PCB we designed back in 1991 for use as a laboratory DC-amp. We only
had to change the 0 Ohm bridges on R1 and R2 to 500k (1%), to get the input
sensitivity required here. As this module is somewhat larger than the original
one, we had to find another place for the RED LED spotlight as well as for
the Jenssen transformer. The transformer guarantees us that the driver will
never get DC, as that would ruin it right away.
It's a PCB we designed back in 1991 for use as a laboratory DC-amp. We only
had to change the 0 Ohm bridges on R1 and R2 to 500k (1%), to get the input
sensitivity required here. As this module is somewhat larger than the original
one, we had to find another place for the RED LED spotlight as well as for
the Jenssen transformer. The transformer guarantees us that the driver will
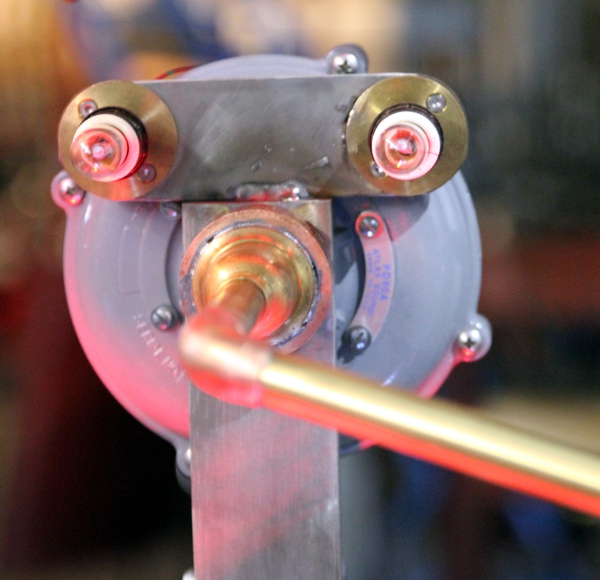
never get DC, as that would ruin it right away.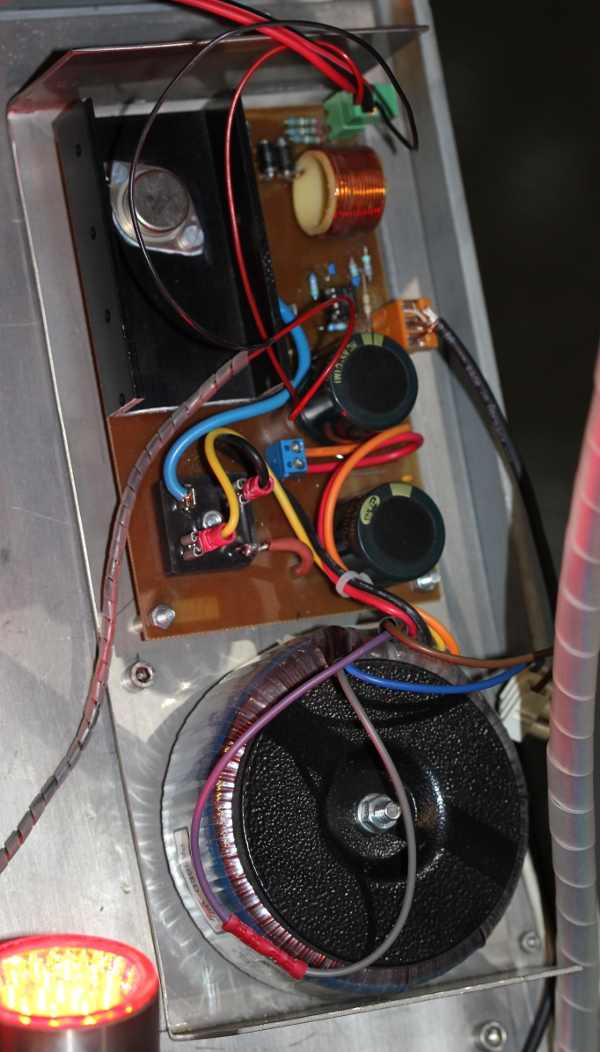 Construction of a new crook in copper and brass to replace the rubber hose
we had hitherto.
Construction of a new crook in copper and brass to replace the rubber hose
we had hitherto. 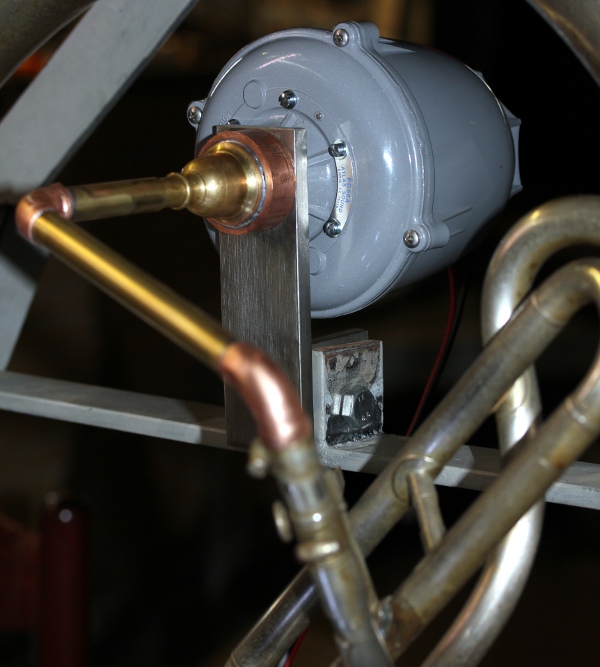
 First tests: it plays again, but the sound quality is not too great. In particular
the pedal notes (15 to 22) do not sound well anymore. So we should consider
a new sound generator board as well as the design of better low frequency
drivers.
First tests: it plays again, but the sound quality is not too great. In particular
the pedal notes (15 to 22) do not sound well anymore. So we should consider
a new sound generator board as well as the design of better low frequency
drivers. The
PCB had to be redesigned, as the maximum board size should be 130 x 100 mm
instead of our usual eurocard format. PCB design finished, exposed, developed
and etched right away. Here is the PCB at 200%:
The
PCB had to be redesigned, as the maximum board size should be 130 x 100 mm
instead of our usual eurocard format. PCB design finished, exposed, developed
and etched right away. Here is the PCB at 200%:  All
components soldered. Missing ones, to be ordered, are 100mH inductor, OP27
or OPA627 opamp, 22k log potmeter. But even without these components, the
board starts up and can be programmed right away. We can test already by using
a TLO71 instead of the OP27. With the introduction of this board, the midi
implementation will undergo major changes...
All
components soldered. Missing ones, to be ordered, are 100mH inductor, OP27
or OPA627 opamp, 22k log potmeter. But even without these components, the
board starts up and can be programmed right away. We can test already by using
a TLO71 instead of the OP27. With the introduction of this board, the midi
implementation will undergo major changes...
 Tungsten
bulbs they are, and they will run automatic, dependent on volume and note-on/off.
Some nasty bugs removed from the 24F firmware. Programming session with Johannes
Taelman on the 30F3010 ds-microprocessor, now just steering the displays.
Display controllers changed from 14,15,16,17 to 34, 35, 36, 37. The midi-note
for the display is now 0 to 99. Of course the sousaphone will only play the
notes 15 to 69.
Tungsten
bulbs they are, and they will run automatic, dependent on volume and note-on/off.
Some nasty bugs removed from the 24F firmware. Programming session with Johannes
Taelman on the 30F3010 ds-microprocessor, now just steering the displays.
Display controllers changed from 14,15,16,17 to 34, 35, 36, 37. The midi-note
for the display is now 0 to 99. Of course the sousaphone will only play the
notes 15 to 69.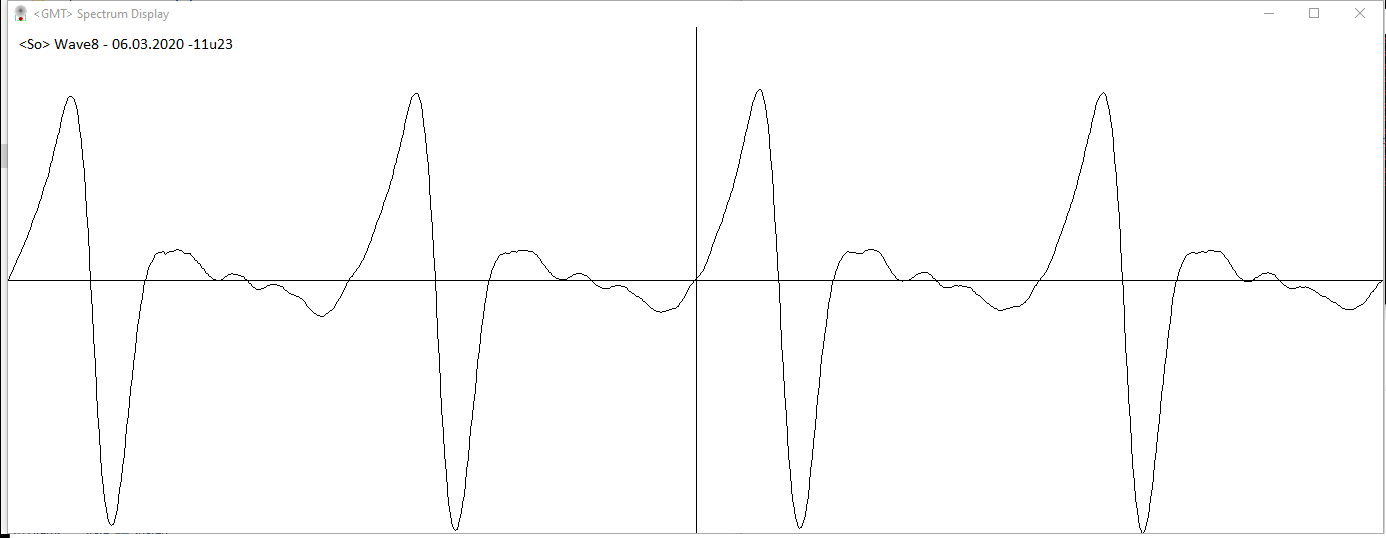
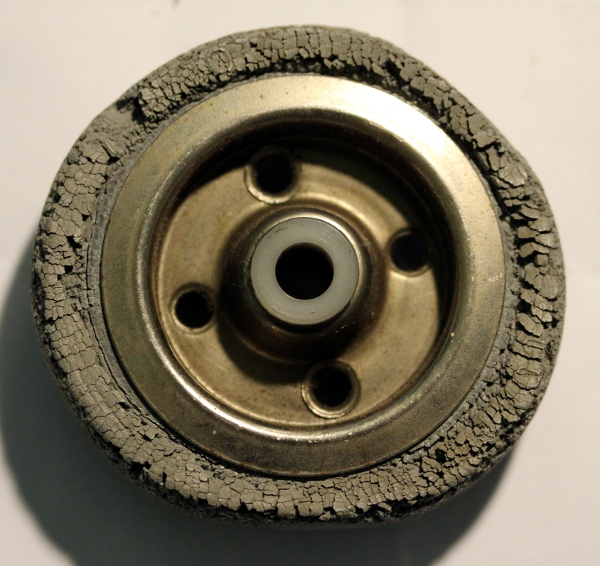
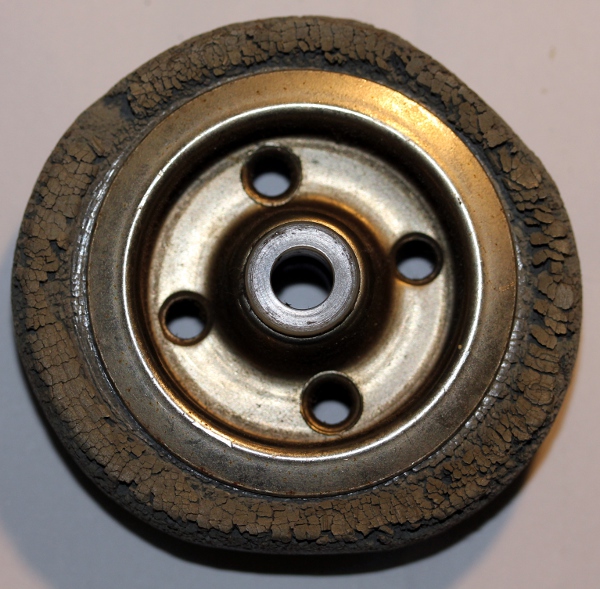 Dont remember what
brand this was... Anyhow, we replaced both wheels. Diameter 75 mm.
Dont remember what
brand this was... Anyhow, we replaced both wheels. Diameter 75 mm.
Notes on further possible improvements:
If ever we would make a version 4 of this robot, we would first of all, design a low frequency membrane compressor. This would make a full ff in the low notes possible. Second, it would be an improvement to use a 32-bit processor instead of the 24EP128MC202. Splitting the dynamic functions from the waveform generating functions, by using two 24EP128 chips and dividing the workload, would already get us rid of all possible glitches. This was done for the <Autosax> robot, version 5. We also went that way for the <Hunt> robot, finished february 2021. Changing the processor to a 24EP256MC202 would give us place for either twice as many waveforms or twice longer wave-samples.
| (Terug) naar logos-projekten: | Terug naar Logos' index-pagina: | Naar Godfried-Willem Raes personal homepage... | Naar katalogus instrumenten | |
Maintenance notes and further technical documentation:
Detailed circuitry for PIC1 on the midihub board:
Detailed circuit for the two large 7-segment display boards:

Valve solenoids: bidirectional August Laukhuff, 24V - 24 VA (24 Ohms per winding, 1 A nominal at 100% duty cycle).
Power Supply: 24V - 5A (unloaded, 29V), 33mF buffer capacitor. Fused. The protective cover over the power supply module is to be removed to get access to the fuse.
Detailed circuit for the waveform generator: (Version 3)
Compression driver (<So> version 3.0):
| frequency | max. power | max. voltage (rms) | note |
| >=100 Hz | 60 W | 31 V | limited to 42 W, due to max. amp voltage swing |
| 50 Hz | 15 W | 15.4 V | |
| 25 Hz | 3.75 W | 7.75 V |
Power amplifier components: (<So> version 3.0)
Display driver, using a dsPIC type 30F3010:
 The waveform
output for the moving coil driver is no longer used in version 3.0.
The waveform
output for the moving coil driver is no longer used in version 3.0.Lamps and LED spotlite specs:
Last update: 2023-10-11 by Godfried-Willem Raes